Updated May 2022
Summary
- This step-by-step guide explains how to create a Facebook campaign for Storemaven testing purposes (these settings are slightly different than the traditional setup for mobile app install campaigns).
- The campaign will direct traffic to mock-up versions of your app store page (which will be evenly and randomly distributed among the variants)
- Storemaven’s platform will collect data on user behavior and conversion from this mock app store page
- Once users click “Get” or “Install” on the Storemaven test page, they will be redirected to the real app store page
There are four phases to this process:
Phase 1: Create a Campaign
Phase 2: Create Ad Set
Phase 3: Create Ad
Phase 4: Create a Pixel & Enter Pixel in Storemaven Dashboard
Let’s Get Started
- Go to Facebook’s Ads Manager
Phase 1: Create A Campaign
Create Campaign
- Click the green “+ Create” button
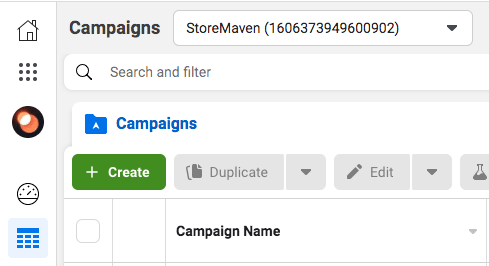
Once you click on “+ Create,” you will be redirected to the screen below

- Click on “Sales”
- Name your campaign under “Campaign Name”
- IMPORTANT: DO NOT select campaign budget optimization, make sure it is turned off as shown in the image below. It will interfere with traffic consistency throughout the test and is not recommended for testing purposes.

Phase 2: Create Ad Set
- Continue to the Ad Set level
- Under “Conversion,” select “Website.”

- Then, in the box under “Website,” you must select a conversion event. We recommend selecting our default event “Complete Registration.” However, you may choose a different event as long as it matches the one you used in your test setup on the Storemaven platform
How many Ad Sets do I need?
- Targeting multiple audiences:
- If you are targeting different audiences and wish to segment them in order to generate audience-based insights in the test, then you will be creating different ad sets to correlate with this structure.
- You will also need to generate a link per ad set from the Storemaven platform.
- Targeting a single audience:
- If you wish to run your test with one audience you will only need to create one Ad Set and generate one test link from the Storemaven platform.
Audience
- In the “Audience” section, fill in the details according to the audience you will be targeting in your campaign

- At the bottom of the Audience menu (next to “Connections”), click on “show more options.” Then click on “Apps” and select “Exclude people who used your app”

Placements
- Under “Platforms”, select the various platforms you will be targeting on Facebook. We recommend the placement options shown below.
- Please note that by using Facebook’s “Audience Network,” your ads will show in approved partner mobile apps and mobile websites that are part of Facebook’s Audience Network
- Users that come from Facebook’s Audience Network platform have the following characteristics:
- Pros: Lower CPC in comparison to Mobile News Feed users
- Cons: Lower Install Conversion rates in comparison to Mobile News Feed users
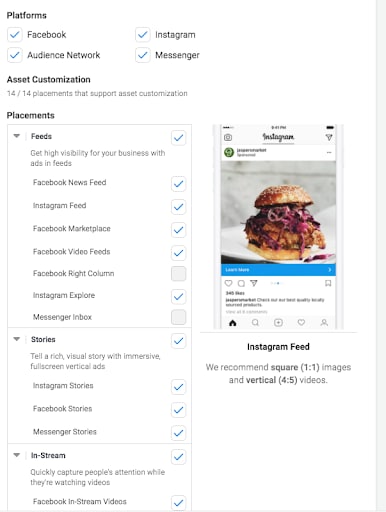
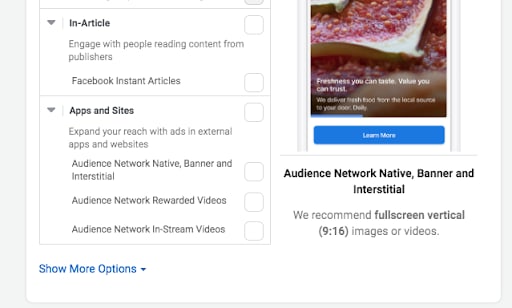
Read more about how to effectively run Facebook campaigns for a Storemaven test here!
- Under placements click the link to “show more options”
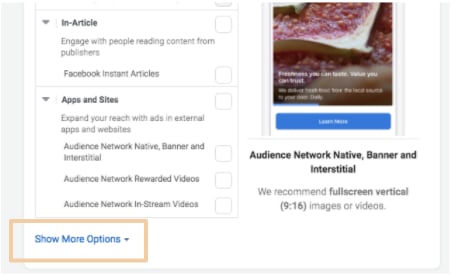
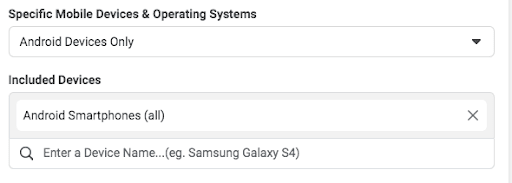
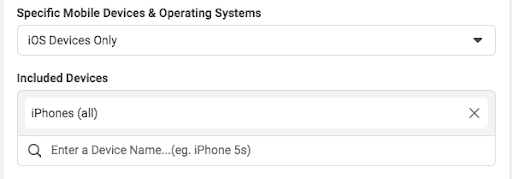
- Under “Specific Mobile Devices & Operating Systems,” select the platform you are testing on (either Android or iOS)
- IMPORTANT: Once you have selected the right platform, exclude any devices that are not phones.
- Google Play Tests: choose Android devices only, unselect “Android Tablets”
- iOS Tests: choose iOS devices only and unselect “iPads” and “Pods”
- The last change to make on the Ad Set level is to select “Show More Options” at the bottom of the page. Select “1-day click” as your conversion window.

Phase 3: Create Ad
- Continue to the Ad level and name your Ad
- Under “Identity,” select your Facebook Page. If relevant, select your Instagram account as well
- Under “Ad Setup,” choose how you want your ad displayed. In this example, we have selected Single Image

- Upload your image(s) or video ad
- Under “Ad Creative” Input your Text and Headline and under “Call to Action”, select “Download”
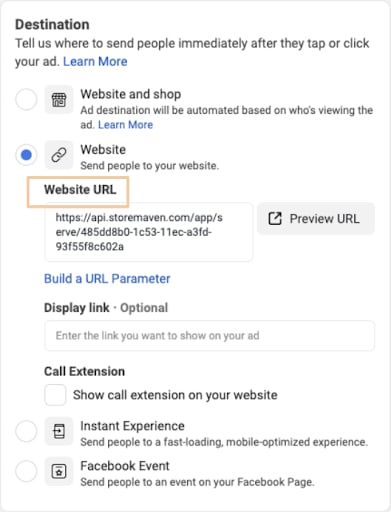
- Under “Destination,” add your Storemaven test URL in the box that says “Website URL” (Re audience testing: If you are targeting different audiences and would like to collect data on the CVR and behavior of these new targets, paste the URL with the relevant parameter here. If you need assistance setting-up different URLs, please contact your Storemaven ASO consultant)
- IMPORTANT: Do not change the display link it must stay blank, otherwise Facebook will flag this as a misleading ad. This setup does not interfere with testing purposes.
- Please note that Facebook will review your ad image to ensure that it complies with its image text guidelines. We recommend referring to the Facebook Ads guide to ensure your ad complies with their requirements. You can also refer to Facebook’s image text check to determine how much text is in your ad image and its potential impact on your ad’s reach.
- Upon completion of all relevant fields, click “Publish” at the bottom right corner. After you click “Confirm,” you will be redirected to another page
- Click “Continue”
- At this point, your campaign will now be active once it is approved
Phase 4: Pixel Setup
NOTE: If you want to use an existing pixel you can skip steps a-e, and continue with the guide.
If you need to create a pixel:
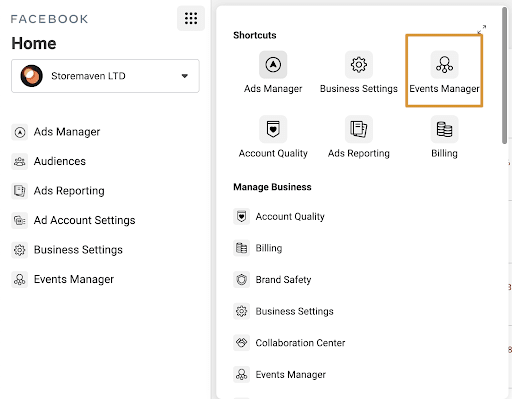
a. Go to the account’s “Event’s Manager”
b. On the left menu click on “Connect Data Source”
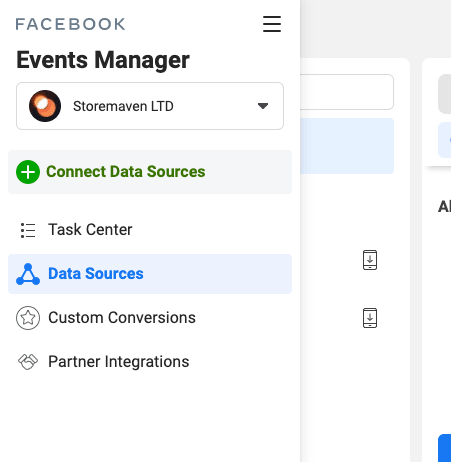
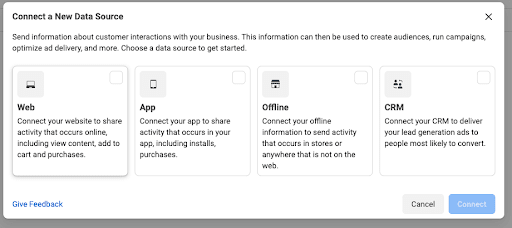
c. Select Web
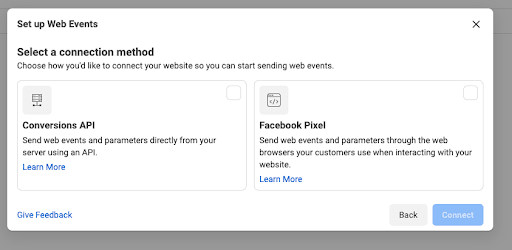
d. Select Facebook Pixel
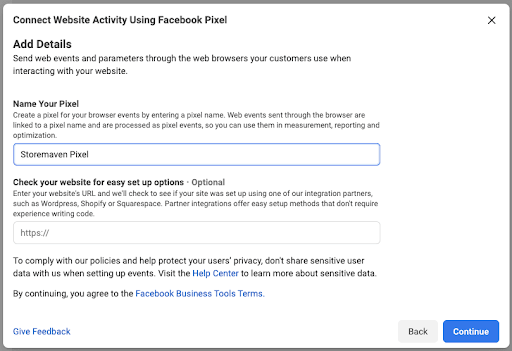
e. Name your pixel and continue
f. Select “install code manually” and then paste the entire base code to the Storemaven dashboard on the product level.
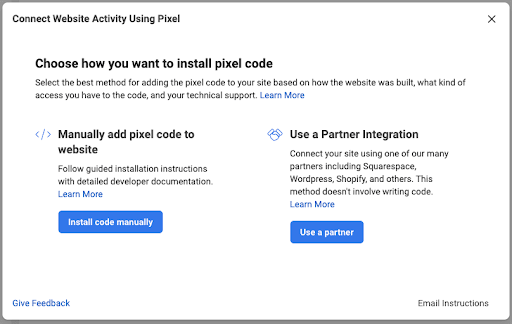
If you have a pixel:
Get Pixel Base Code from Facebook
- Go to Events Manager
- Select the pixel you want to set up
- Click on Add Event
- Select “From a New Website”
- Select Install code manually
- Copy the pixel base code
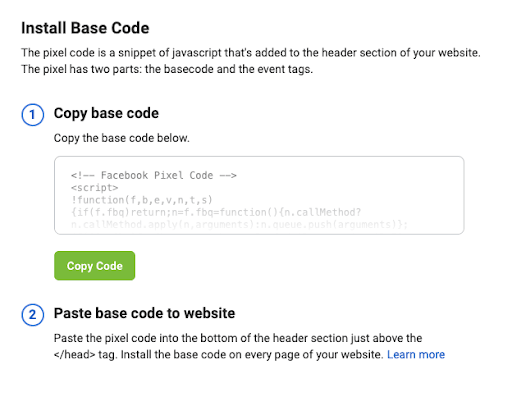
Entering your pixel manually to Storemaven
Add Pixel Base Code to Storemaven Dashboard
- Go to your Storemaven dashboard and open the relevant product for this pixel

- Click the pixel box icon on the top right corner of the relevant app page
- Choose pixel type as “Facebook”
- Enter Pixel Code by pasting the pixel code you copied from Facebook Ads Manager
- Choose conversion event (make sure it’s the same conversion event you chose in Facebook’s Ads Manager page – we recommend complete registration)
- Click “Done”
- All tests created under that product will now automatically be implemented with the pixel.
- You must repeat this process for every product and platform
- If you’d like to disable/change a pixel for a specific test, you repeat this step and can edit its details at any time


